Replacing My HN8145V Optical Modem with Huawei MA5671A
Introduction
The history of home broadband, from ADSL, FTTB to FTTH, spans sixteen years. Initially, my parents used an ADSL modem connected to the phone line for dial-up internet. Around 2009, our building switched to FTTB. At some point, we also had EPON ODN access. During the summer of 2018, when I planned to upgrade our 50M broadband to 100M, I underwent my first optical modification. In March 2021, I learned that gigabit home broadband was becoming popular and inquired with my ISP, only to find out that our connection was still EPON and not suitable for gigabit infrastructure. By May, after some upgrades, our building gained GPON ODN access, and gigabit broadband was brought home.
This article serves as a note, documenting my tinkering process in a conversational manner for future reference and for others’ benefit.
Starting from Scratch
I titled this section “Starting from Scratch” because this task requires some hands-on skills. Just like repairing a notebook’s southbridge, you need more than basic skills to succeed. By the time I recorded this process, it was already two months later. Due to an outbreak in Zhuhai, I returned home from school and naturally completed the documentation at home.
Initially, I was inspired to start tinkering after reading the article MA5671A GPON Stick Flashing OpenWrt to Replace Bulky Optical Modems Saving Small Weak Electrical Boxes.
On December 18, I actually discovered another article How to Get 2.5 Gbps on a Single Device without the Fastgate, but I couldn’t understand it and had to rely on Google Translate. The PDF version can be downloaded here. The translated version is available for download here. The article explains everything clearly, and I won’t go into the details of flashing the firmware using a programmer, as I didn’t document that process and had already left Zhuhai to return home. You can refer to the article mentioned earlier, which details the flashing process via Flashing.
Related Devices and Environment
- Huawei MA5671A PON Stick ONU

- HPE 530FLR SFP+ Adapter
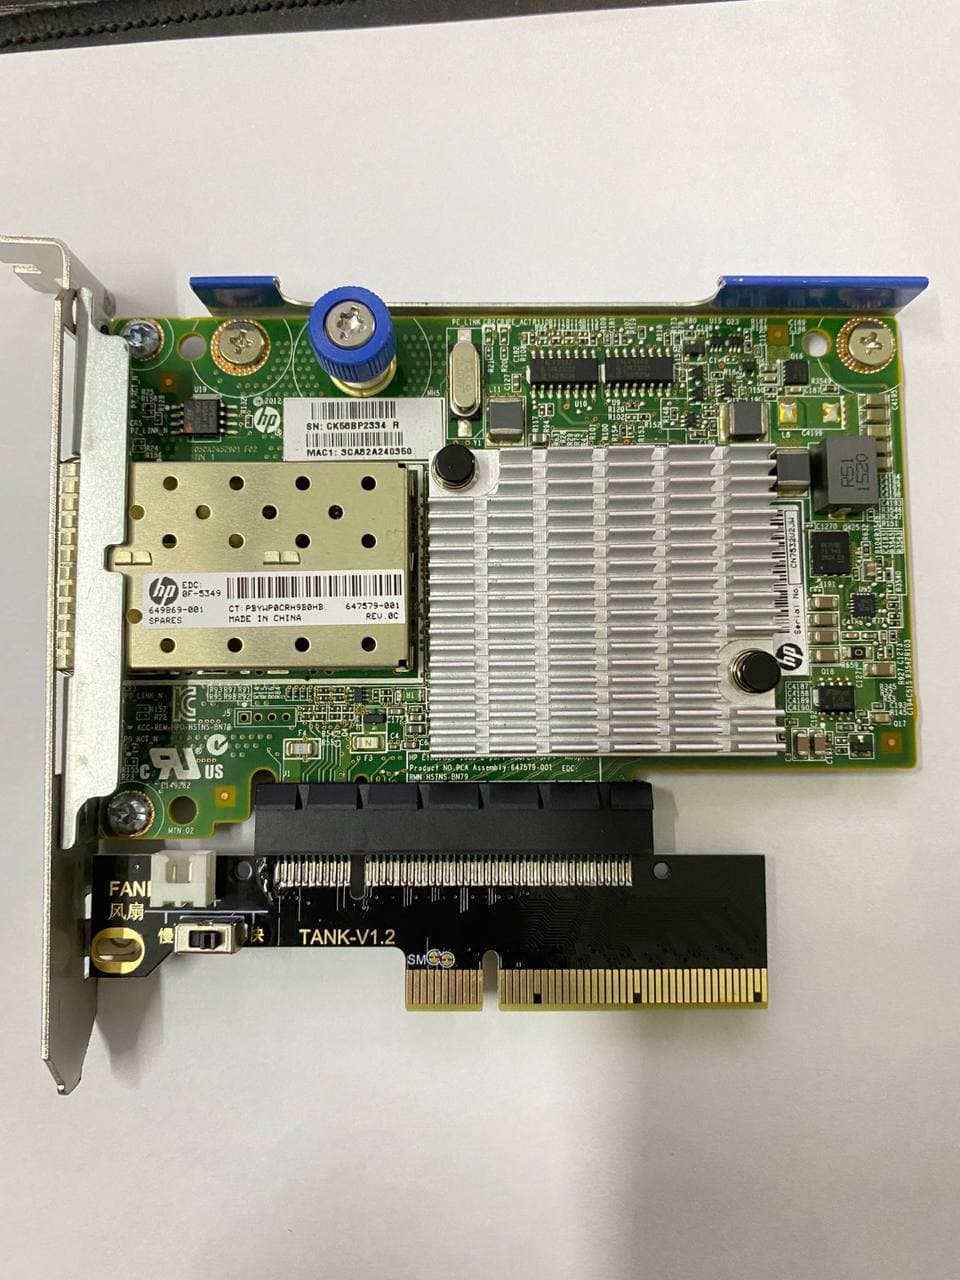
Using Broadcom’s eDiag, you can modify the parameters of this network card and change the driver to negotiate a 2.5G rate, which is why I specifically chose this card. 2.5G SGMII optical cards are quite niche.
Switching the Network Card’s Operating Mode
As you might have guessed, this part was documented after I returned home, hence the detailed recording. I didn’t expect that due to the outbreak in Zhuhai, I would actually return home four days earlier than planned. Originally, I was supposed to be in Guangzhou for breakfast on the 18th and wouldn’t get home until that evening.
The article Bypassing the HH3K up to 2.5Gbps using a BCM57810S NIC provides a detailed explanation of how to switch this network card’s operating mode.
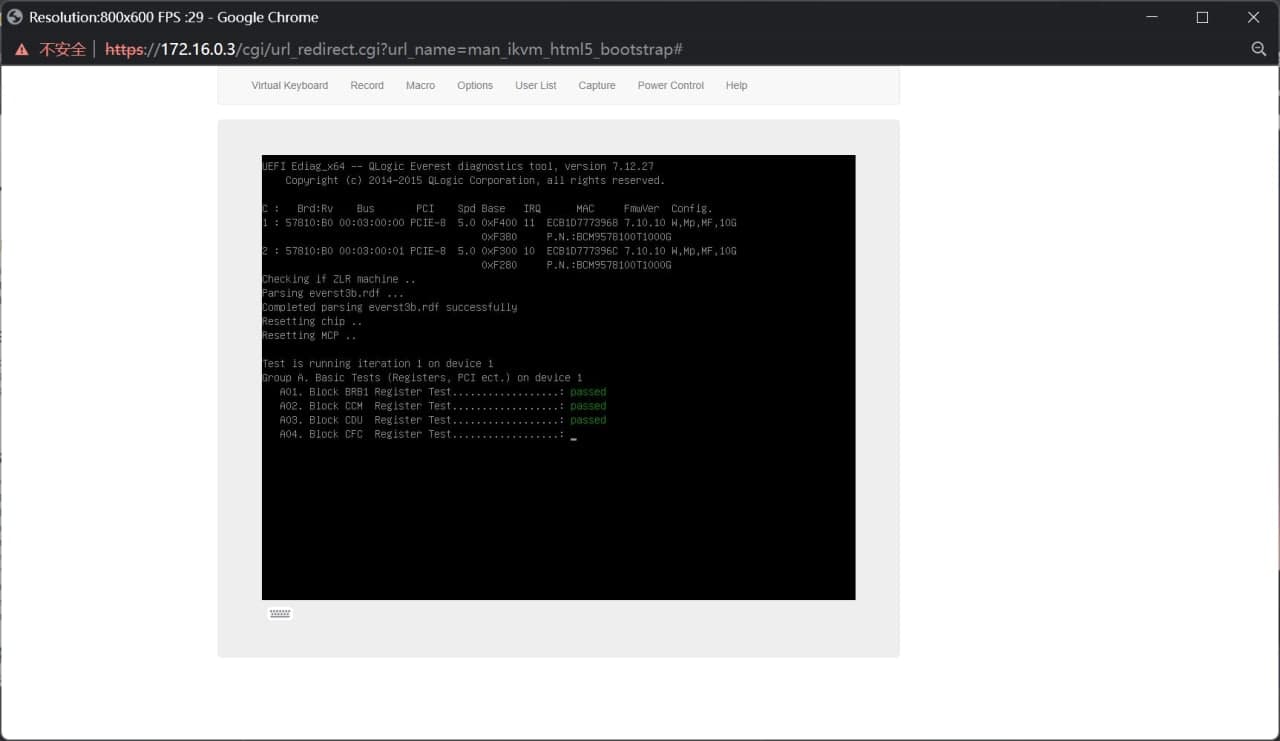
How to enable 2.5G functionality via DOS eDiag: (The same applies for UEFI eDiag)
- Download eDiag
- Download Rufus
- Use Rufus to create a bootable MS-DOS USB drive
- Copy all contents from the folder containing ediag.exe, including ediag.exe itself, to the USB drive
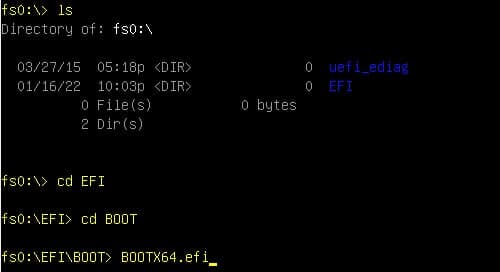
- Boot from USB
- Run eDiag in DOS mode using the following command:
ediag.exe -b10eng
- Execute the following commands (please read and verify them first; do not execute blindly. Refer to the attached images above):
device 1
nvm cfg
7 (could also be 6, depending on the situation)
35=70
36=70
56=6
59=6
save
exit
After completion, you can run nvm cfg for verification.
I used UEFI to start eDiag, as shown in the image below:
Note: I encountered a pitfall where I ran ediag without parameters and got caught in an endless self-check.
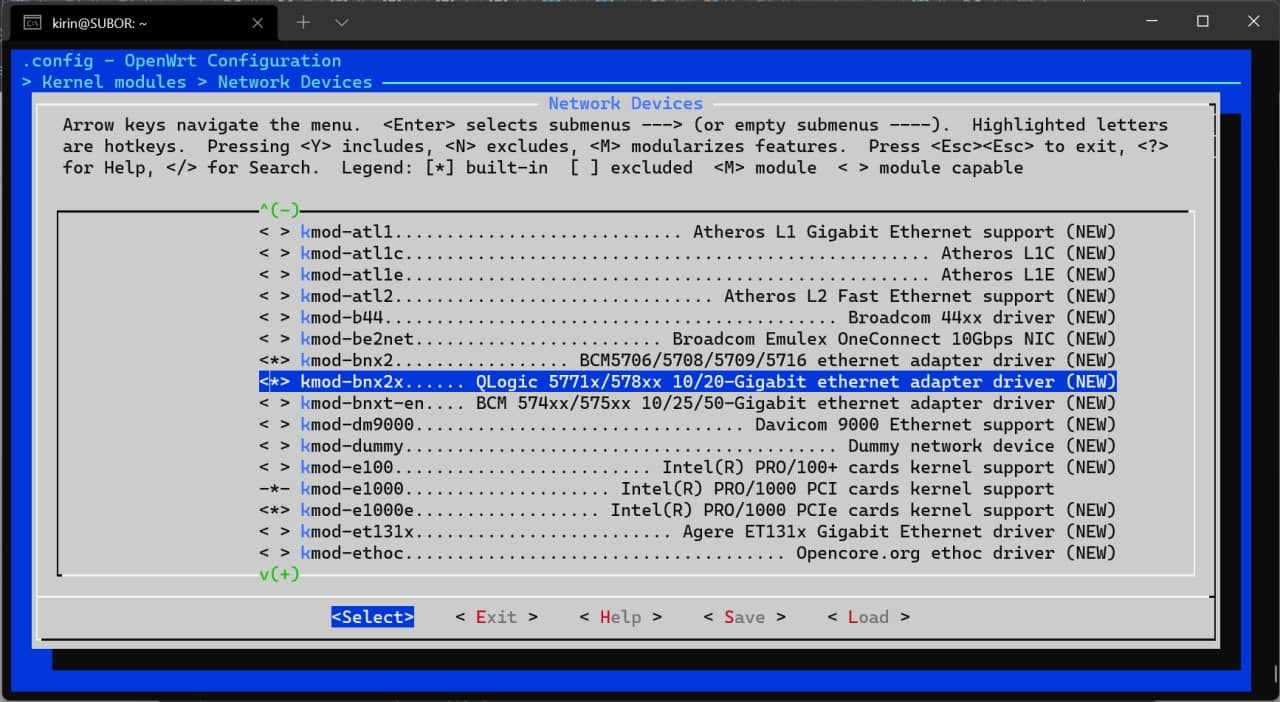
Self-compiling OpenWrt to Enable Kernel Support for 2.5G Operating Mode
I referenced Re: Bypassing the HH3K up to 2.5Gbps using a BCM57810S NIC OpenWRT x86 64 Snapshot Build Guide. The kernel patch used is available at https://github.com/JAMESMTL/snippets/blob/master/bnx2x/patches/bnx2x_warpcore_8727_2_5g_sgmii_txfault.patch.
At the same time, I submitted this PR to Lean’s OpenWrt repository, so that theoretically, future firmware compiled will support this operating mode by default (5.10/5.4).
Make sure to select this option when compiling:
Adjusting the Parameters of the PON Stick ONU
There’s a pitfall here: the fiber optic interface for telecom access is SC/UPC, which requires an adapter to convert to SC/APC. This is a simple task that can be done via Taobao.
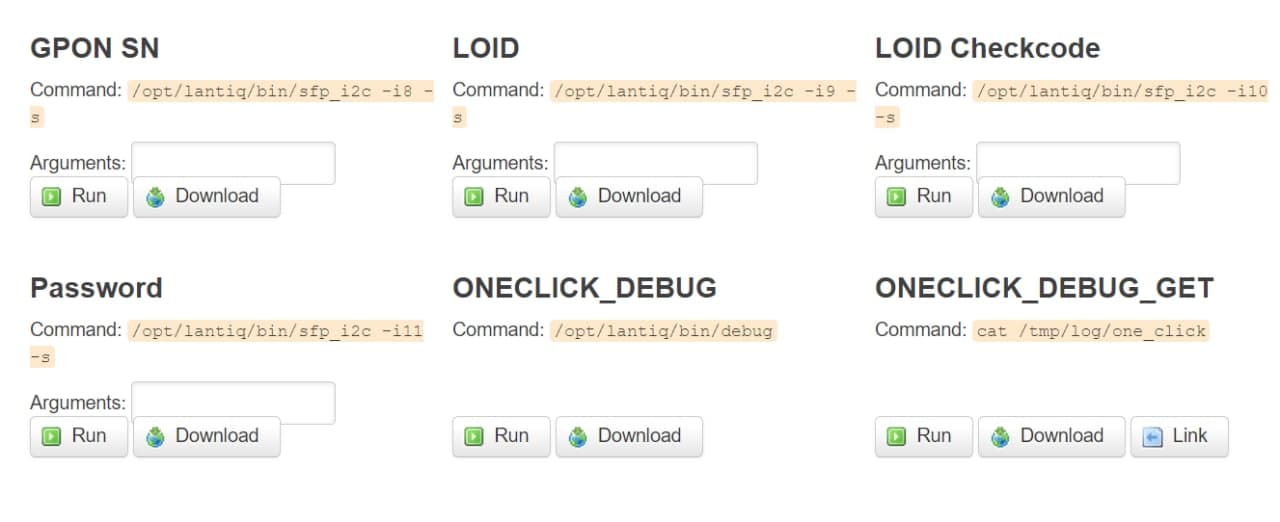
Adjusting parameters is quite simple; just set the computer’s network card IP address to the 192.168.1.0/24 subnet. I set it to 192.168.1.2, then accessed http://192.168.1.10 to set parameters like LOID, SN, VLAN, etc.
A New Flashing Method?
Apart from disassembling and flashing, you can also use TTL for flashing.
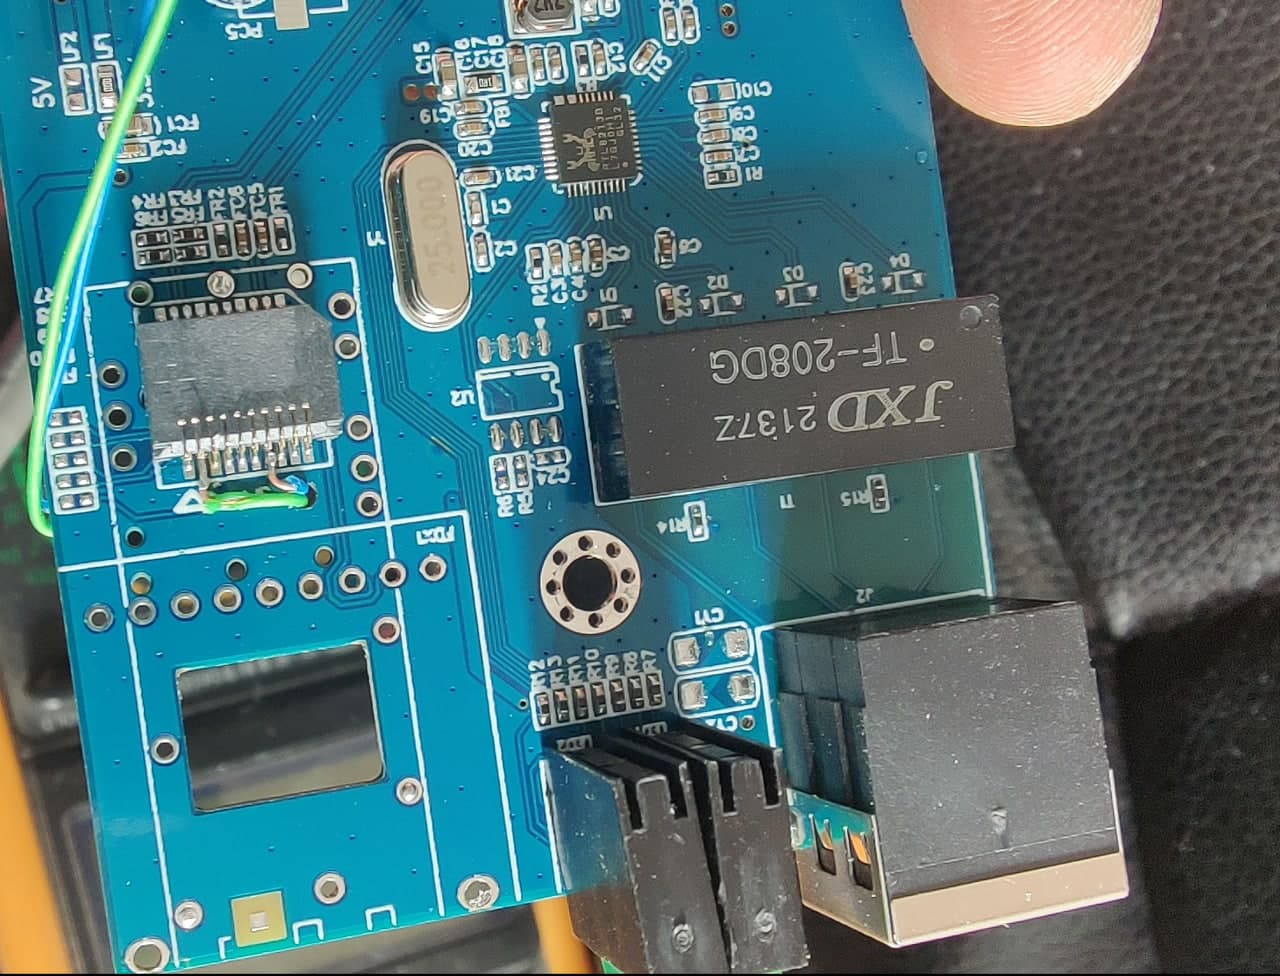
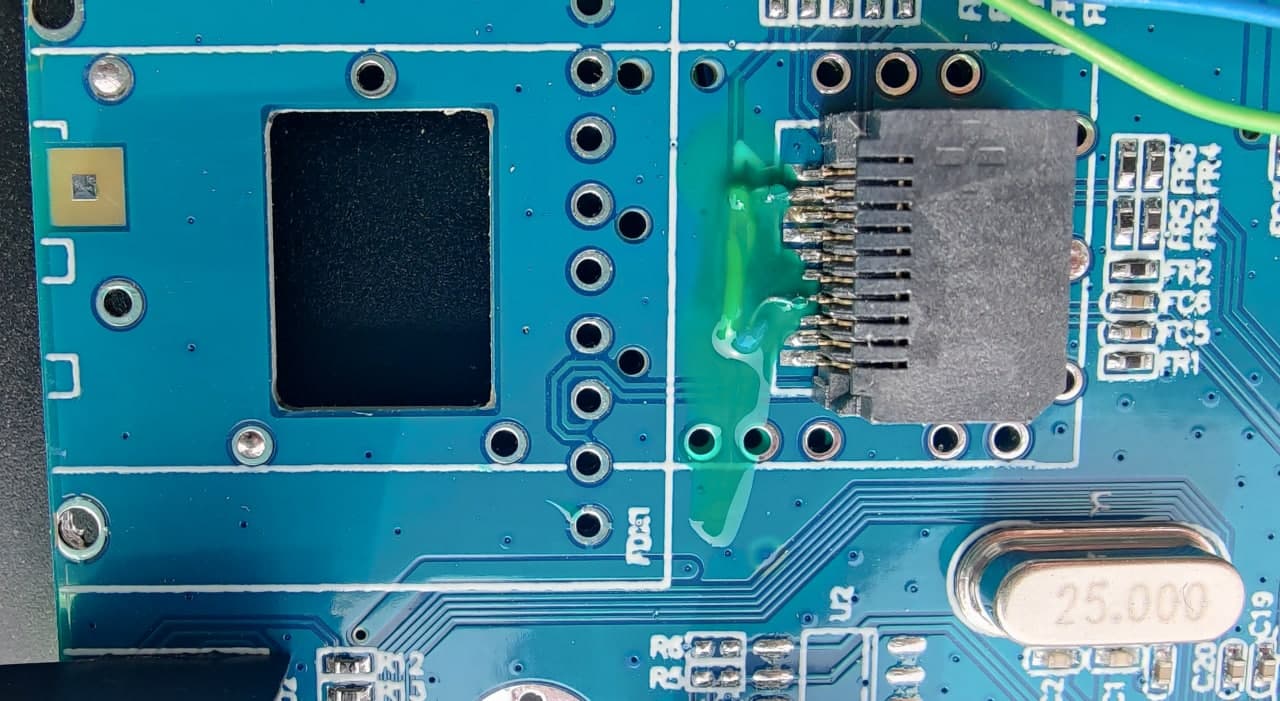
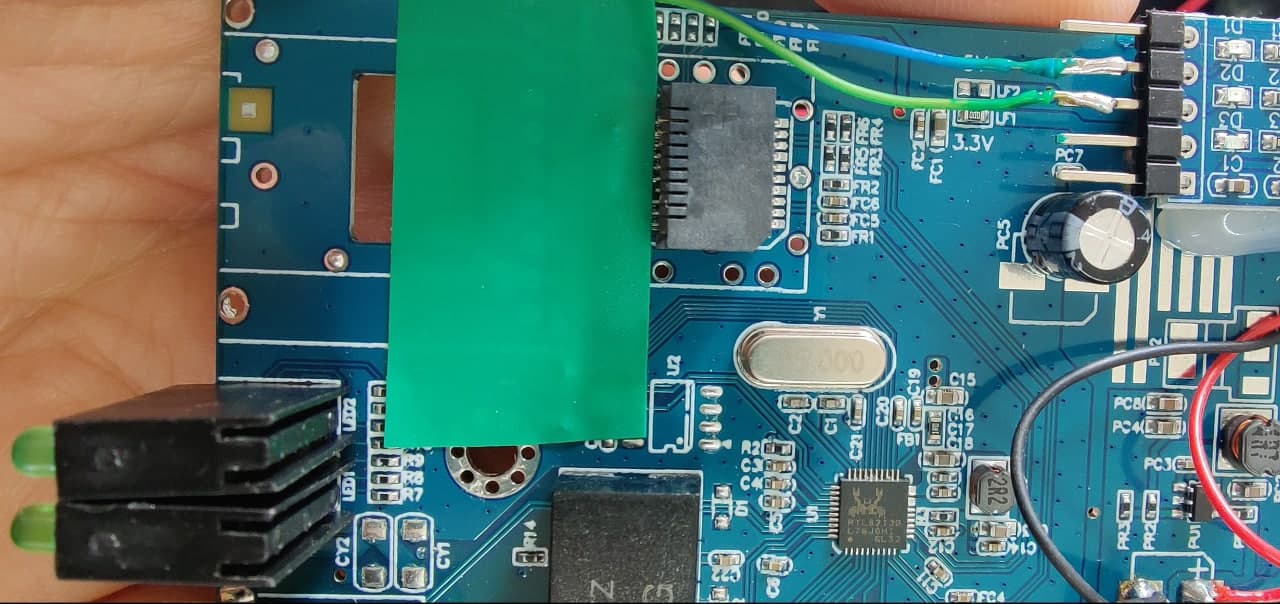
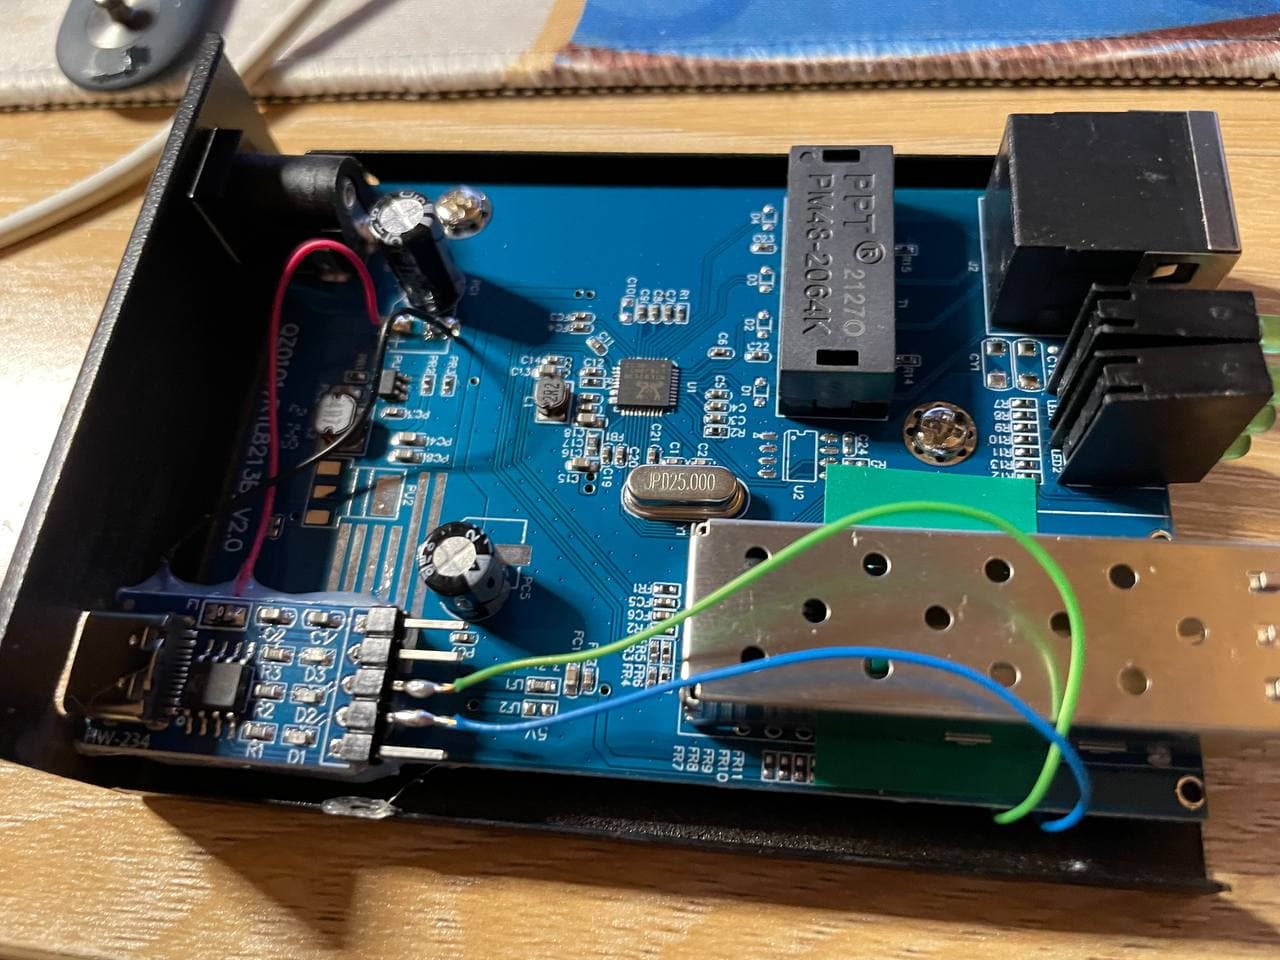
This is a modified transceiver that we can use for non-disassembly flashing.
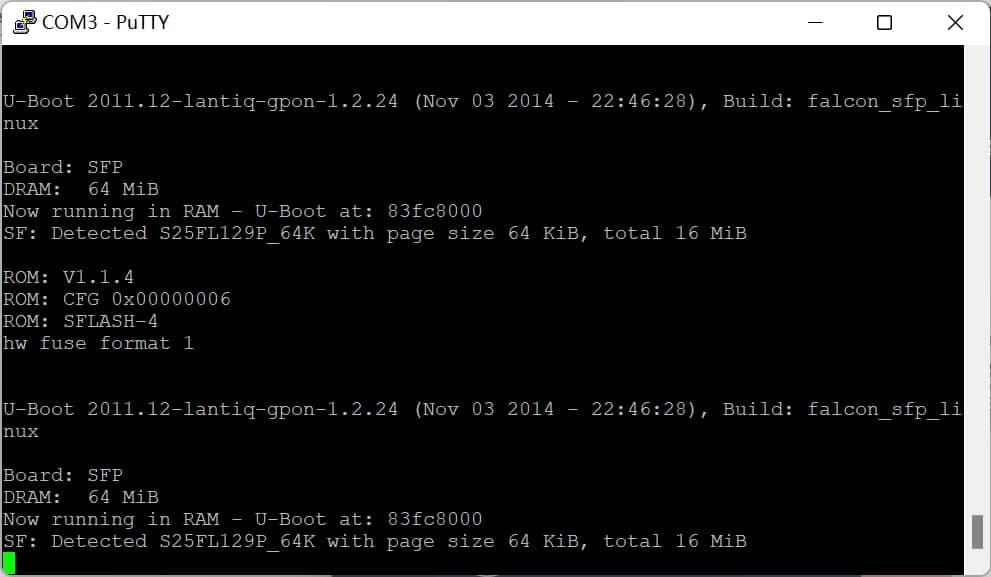
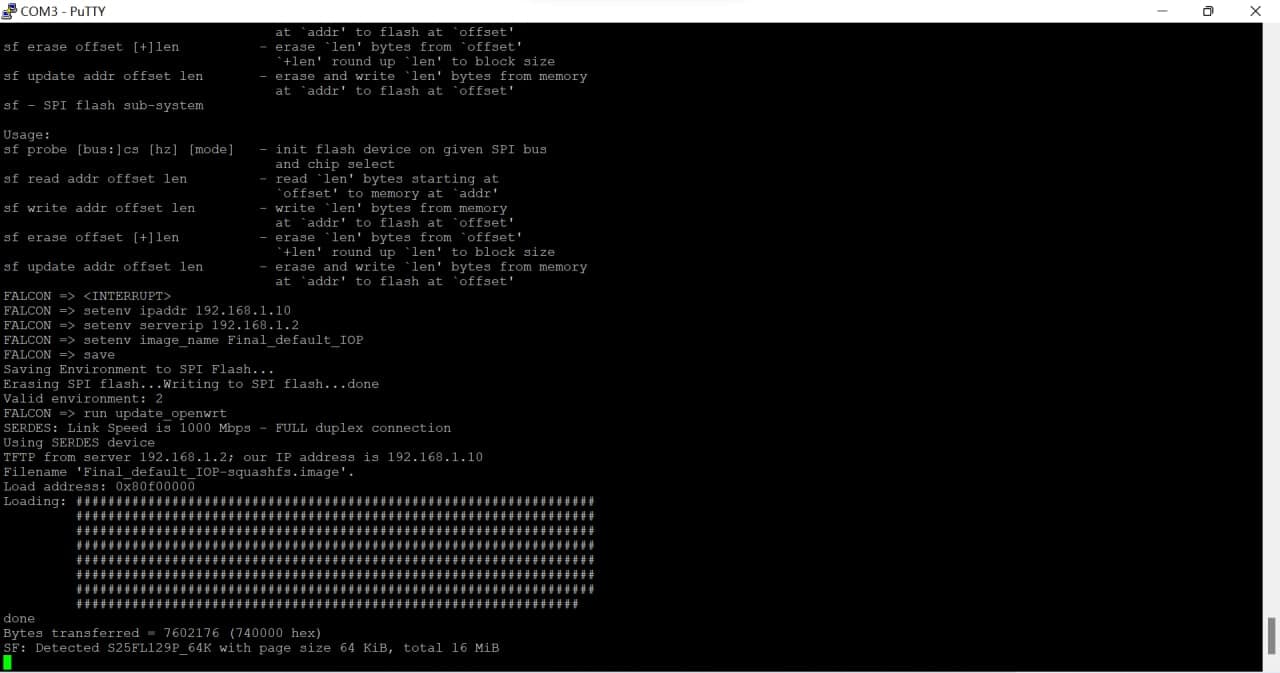
The tricky part here is that the bootdelay in the uboot environment variables is set to 0, so we must continuously press Ctrl+C while connecting the stick.
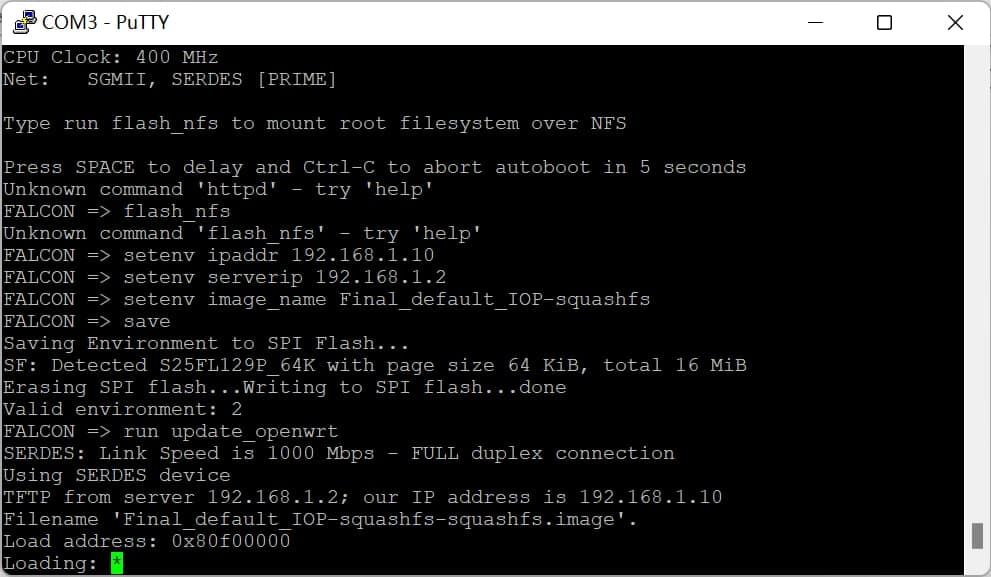
Then run the command:
setenv ipaddr 192.168.1.10
setenv serverip 192.168.1.2
setenv image_name Final_default_IOP
save

run update_openwrt

At this point, we see the FX/FDX lights on the transceiver turn on. Wait for the TFTP Server to display a successful transfer message, indicating a successful flash.
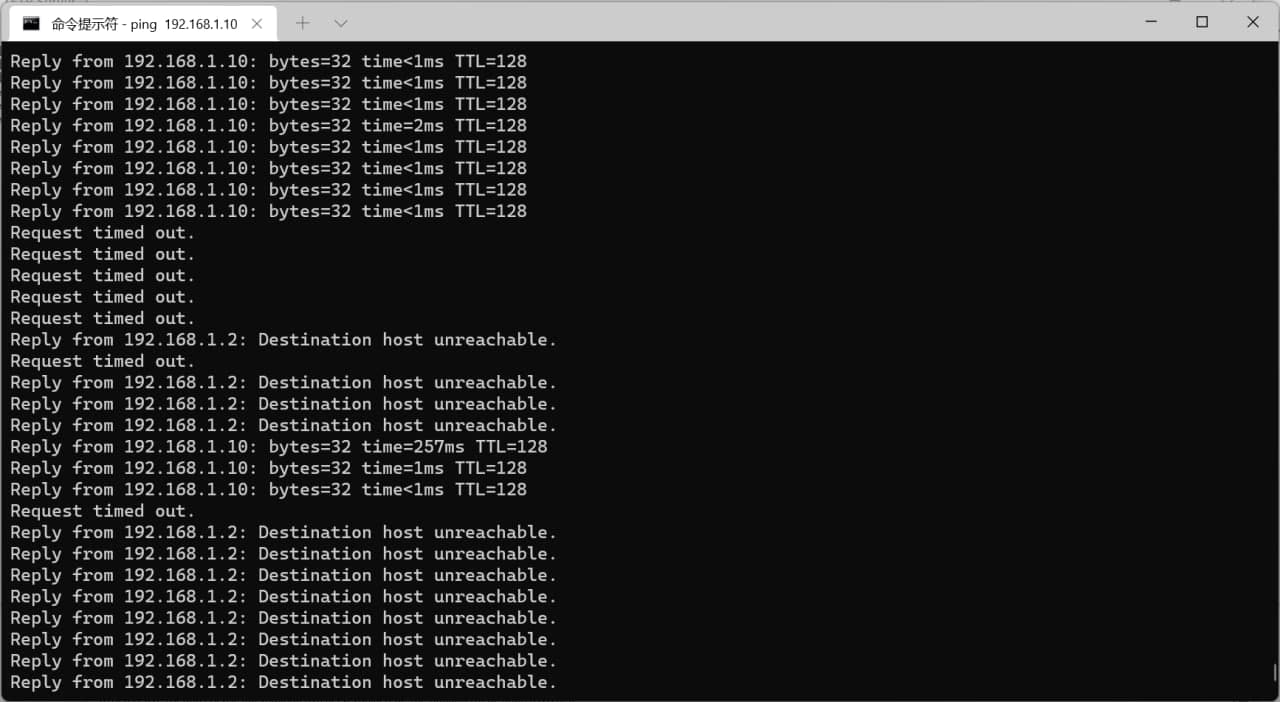
At this point, you can also use ICMP Echo to determine the online status of the PON Stick ONU.
After waiting 5-15 seconds, you can disconnect the PON Stick and power it back on. You can then access luci at http://192.168.1.10/.
Conclusion
Now we can enjoy the redundant bandwidth provided by the operator’s gigabit broadband!

The server is really fast (incredible).
Anecdotes (temporarily postponed)
Using TTL + TFTP to Flash the mtd1 Partition to Recover Lost bosa Data (uboot_env)
This can also be achieved using similar methods (too lazy to write).
About Switch Flow Control (802.3x)
I’ll have to wait for @FlintyLemming’s Switch to arrive for testing.
Edit: Ultimately, I resolved the issue by changing the switch.
References
- MA5671A GPON Stick Flashing OpenWrt to Replace Bulky Optical Modems Saving Small Weak Electrical Boxes
- Support MA5671A SFP GPON
- How to Get 2.5 Gbps on a Single Device without the Fastgate
- Bypassing the HH3K up to 2.5Gbps using a BCM57810S NIC
- Re: Bypassing the HH3K up to 2.5Gbps using a BCM57810S NIC OpenWRT x86 64 Snapshot Build Guide